AI Photo Wednesday - Smart Kitchen
Posted on February 7, 2024 • 2 min read • 392 words
Every Wednesday, I post a photo/illustration that has been created by AI, with accompanying text and explanation.
I use Midjourney to create images and photos for my blog and other media. Today the topic is ‘Smart Kitchens’
The Story
For an article on how you can [make your kitchen smart]/en/2024/ai-foto-woensdag-slimme-keuken, I wanted to have a ‘signature’ image that screamed: SMART KITCHEN, but in an old-fashioned way. You could come across it in the cartoon “The Jetsons”.
The Photo
Used Prompt
First I created an image with
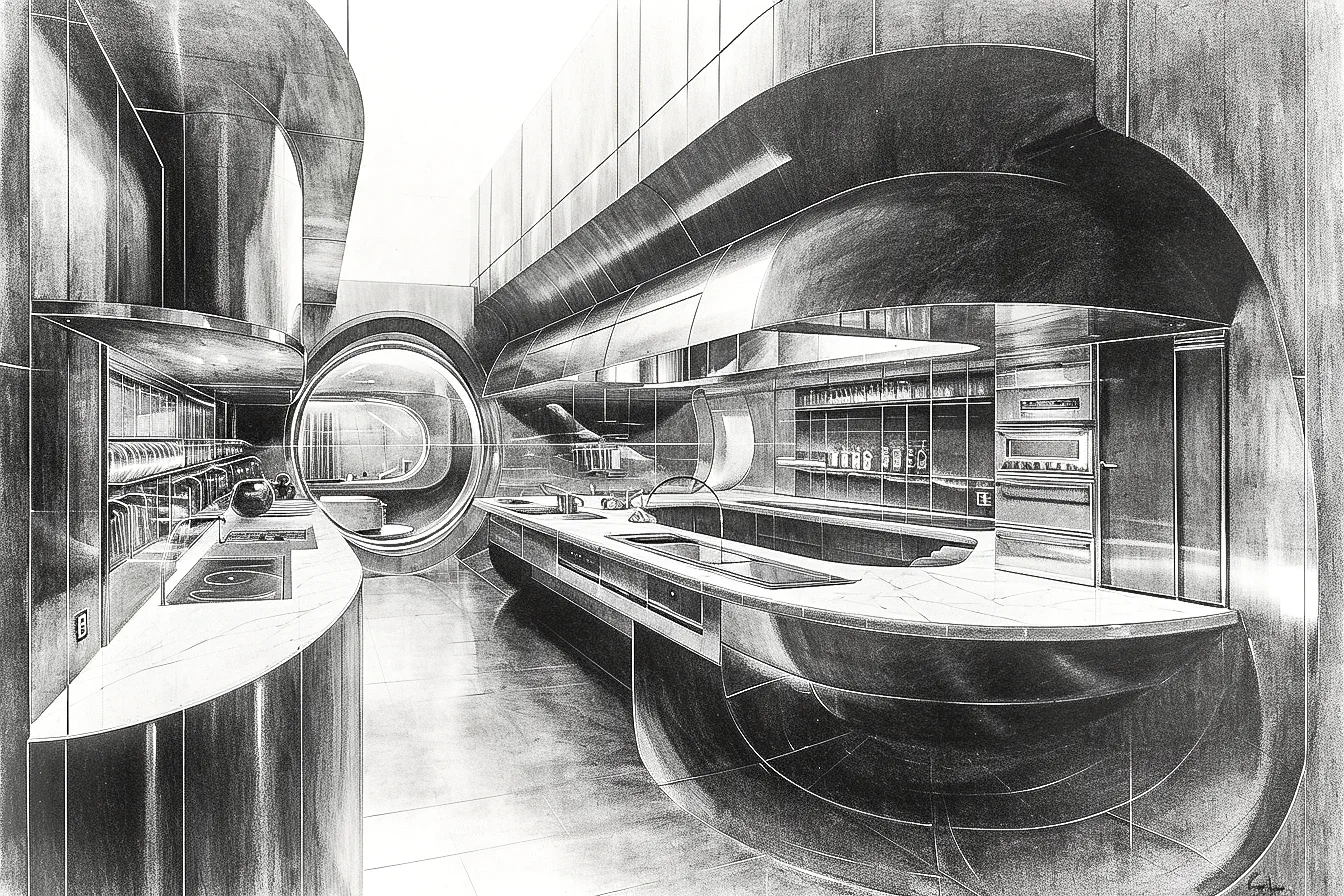
a black and white pencil drawing of a futuristic kitchen with various smart appliances
This resulted in a nice picture, but it wasn’t the color and style I wanted.
 I could do two things: Either edit the prompt and try again until it’s right, or adjust the image in Photoshop to make it what I wanted.
Of course, I chose the third option: A new prompt, but with the image as a starting point. This can be done quite easily in Midjourney by starting the new prompt and providing a link to where the image can be found. Since the dialogue with Midjourney works in Discord, it’s simply a matter of dragging the image to the prompt. You then automatically get a link to that image.
I could do two things: Either edit the prompt and try again until it’s right, or adjust the image in Photoshop to make it what I wanted.
Of course, I chose the third option: A new prompt, but with the image as a starting point. This can be done quite easily in Midjourney by starting the new prompt and providing a link to where the image can be found. Since the dialogue with Midjourney works in Discord, it’s simply a matter of dragging the image to the prompt. You then automatically get a link to that image.
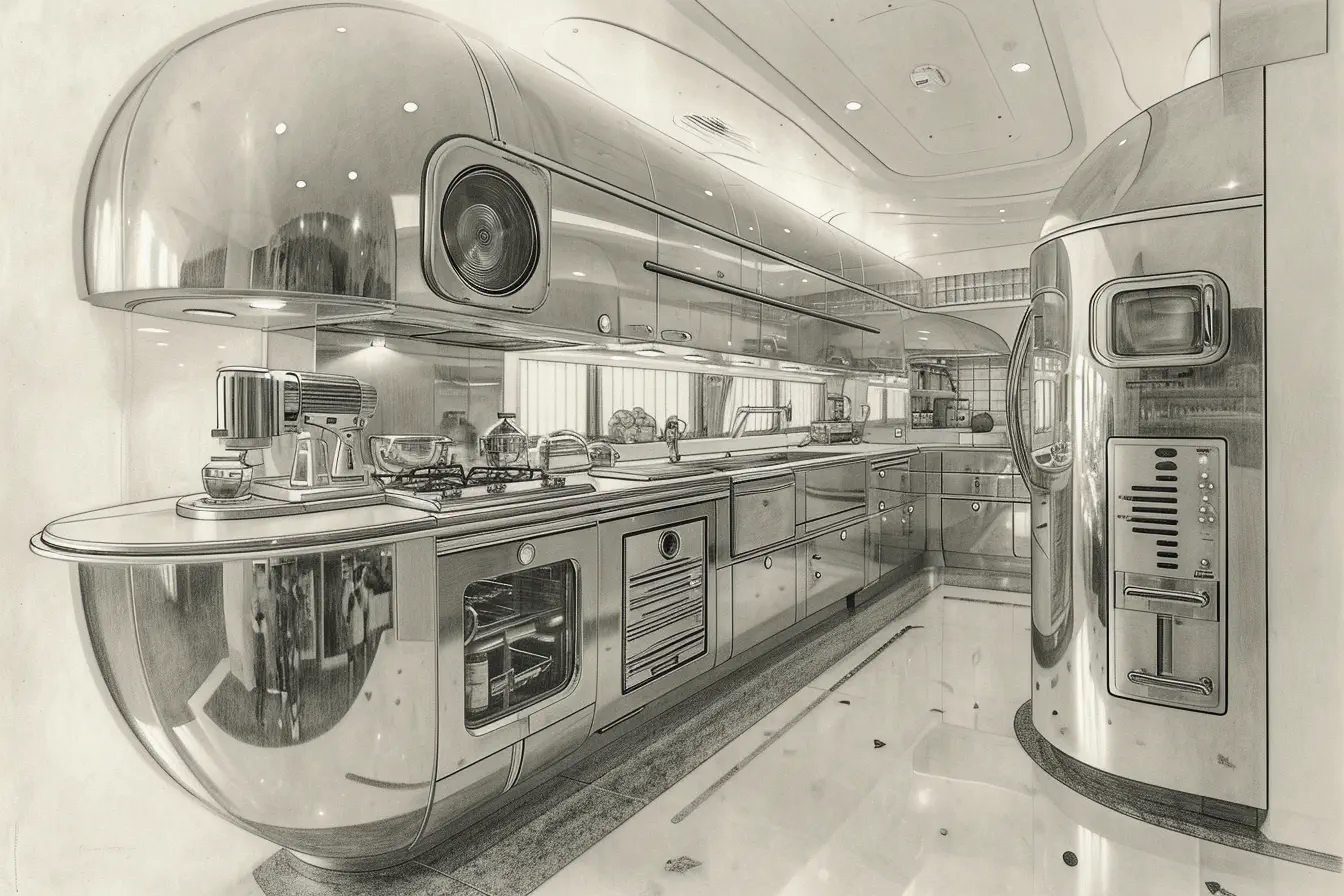
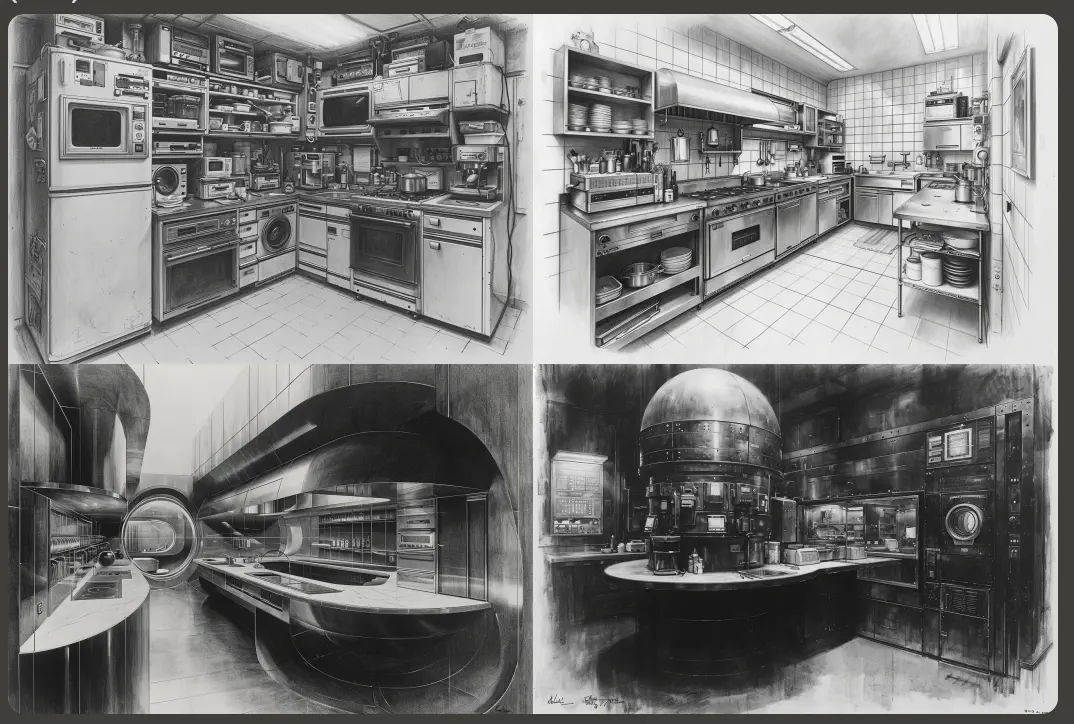
The final prompt has become this:
a charcoal drawing of a futuristic kitchen with various smart appliances
That resulted in some nice pictures. In the end, I chose the picture on the bottom left.
Editing
I usually edit illustrations in Photoshop. The same goes for this one. Before I started, I made a copy of the first layer. Then, on the copy, I performed a number of basic edits. These are ones I basically do on every illustration or photo:
- Convert to Smart Object
- Apply Camera Raw filter with a number of settings
- Exposure slightly increased (+0.32)
- Contrast increased (+7)
- Highlights heavily reduced (-93)
- Shadows almost maximized (+95)
- Whites towards maximum (+81)
- Blacks could be a bit darker (-39)
- Some additional sharpening (150) with masking (96) to get nice sharp edges
After that, I placed the original layer above the edited one and chose ‘divide’ as the blend mode with an opacity of 16%. On top of that, I applied a trace contour smart filter with level 192. This made it look more like a drawing.